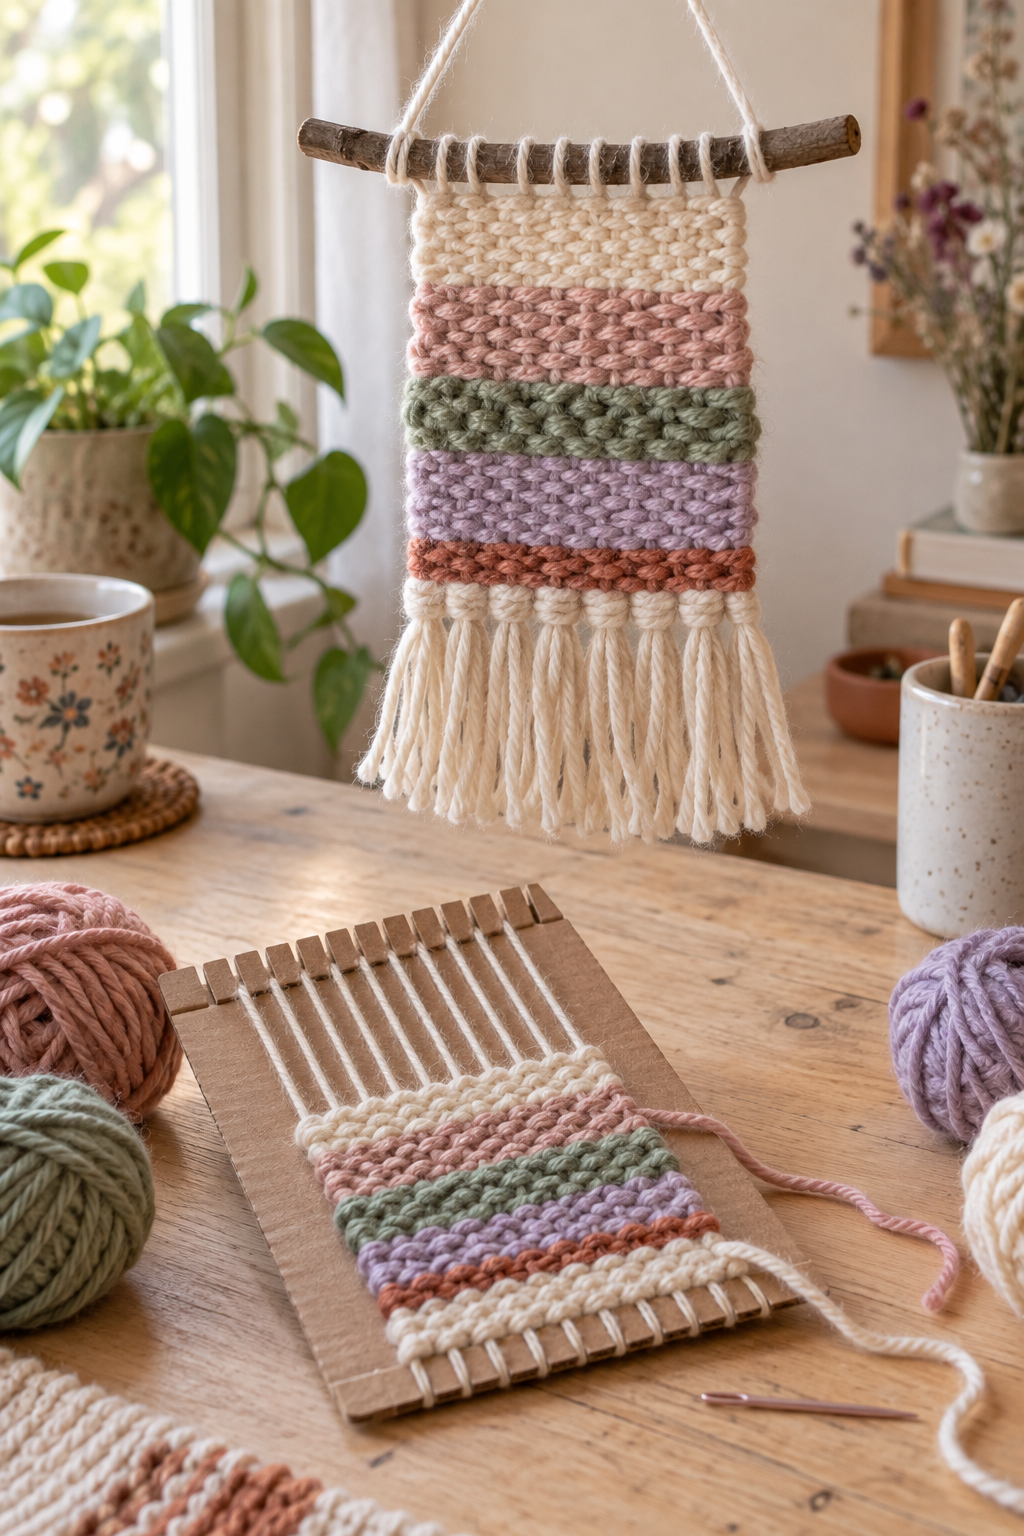
The idea: A piece of corrugated cardboard can hold a row of straight warp threads just like a small frame loom. Weave leftover yarn over and under those threads, change colors whenever you like, and finish the piece on a twig or thin dowel. The small scale makes this a forgiving first weaving project.
Choose yarn that behaves
Medium-weight or chunky yarn is easiest to see and control. Smooth yarn makes tidy rows, while one fluffy or softly twisted yarn adds texture. Save very slippery ribbon yarn and eyelash yarn for a later project—they can hide the over-under pattern and make it harder to spot mistakes.
Pick three to five colors that already look good together. A simple sequence of ivory, blush, sage, lavender, and one warm accent creates variety without turning every row into a decision.
Build and warp the loom
- Cut the cardboard. Cut a firm rectangle about 7 inches wide by 11 inches tall. Corrugated cardboard from a shipping box is sturdier than a thin cereal box and is less likely to bow while you weave.
- Mark matching notches. Along both short edges, draw a line ½ inch from the edge. Make small marks every ½ inch across each line, keeping the top and bottom marks directly aligned.
- Cut the loom teeth. Snip from each edge to its pencil line. The notches should be deep enough to hold the yarn but not so deep that the cardboard tabs become flimsy.
- Add the warp. Tape the end of a smooth, strong yarn to the back. Bring it through the first top notch, straight down the front into the matching bottom notch, around the back, and up through the next top notch. Continue across the loom. The strands should feel firm but not guitar-string tight.
- Check the tension. Press lightly on the center strands. They should give a little and spring back. If the cardboard is bending or the outside threads feel much tighter, unwind and warp again with less pull.
Weave the wall hanging
- Start with a manageable length. Thread a blunt tapestry needle with a piece of yarn about as long as your outstretched arms. Leave a 4-inch tail at the side; you will tuck it into the back later.
- Make the first pass. Weave the needle under one warp thread, over the next, and continue across. For the return row, reverse the pattern so every thread that was “over” becomes “under.”
- Bubble before you beat. Instead of pulling the yarn into a tight straight line, leave a shallow arch across the warp. Use your fingers or a fork to press the arch gently down into place. This gives the weft enough room to travel around each warp thread without pinching the sides inward.
- Build a stable base. Weave six to eight rows in the first color. Check the outside edges every few rows. They should remain parallel to the cardboard rather than forming an hourglass.
- Change colors cleanly. End the old yarn at one side with a 4-inch tail. Begin the new color at that same edge, leaving another tail. Keep weaving; the tails can be woven into the back after the piece leaves the loom.
- Add simple texture. Alternate a few bands of smooth yarn with one thicker or fluffier yarn. You can also weave two strands together for a raised stripe. Keep the basic over-under path the same so the structure stays secure.
- Stop before the notches. Leave about ¾ inch of visible warp at the top and bottom. Pack the final rows gently with a fork, then check that the finished rectangle is centered and the edges are even.
Take it off the loom
Slip the top warp loops out of their notches one at a time and slide a thin dowel or clean twig through them. At the bottom, lift each loop out, cut it at the fold, and tie neighboring warp ends together with snug square knots. Work slowly so the last woven row does not loosen.
For fringe, cut matching yarn pieces about twice the finished fringe length. Fold each piece in half, tuck the fold under the bottom edge, pull the loose ends through the loop, and tighten gently. Trim the fringe only after the wall hanging has rested flat for a few minutes.
Weave the side tails into several rows on the back with the tapestry needle. Tie a hanging cord to both ends of the twig, then move the knots until the weaving hangs straight.
Common fixes
The sides pull inward
Your weft is being pulled too tightly. Undo the last few rows, lay the yarn in a shallow arch, and press it down. Check the width after every two or three passes until your hands learn the right amount of slack.
The rows look loose or gappy
Use a fork to press each row toward the previous one, working across the full width instead of pushing only in the center. Do not compact so hard that the cardboard bends.
The cardboard bows
The warp is too tight or the cardboard is too thin. Loosen the warp if you can. For your next piece, glue two layers of cardboard together with the corrugation running in opposite directions.
The fringe will not hang evenly
Mist it very lightly with water, comb it with your fingers, and let it dry while hanging. Trim with sharp scissors, taking off a little at a time rather than cutting one perfectly straight line in a single pass.
Make the next one your own
Once the over-under rhythm feels natural, try a narrower color palette, a longer fringe, or one oversized textured stripe. Reuse the cardboard loom until the notches soften, then trace it onto a fresh piece of cardboard for your next small weaving.