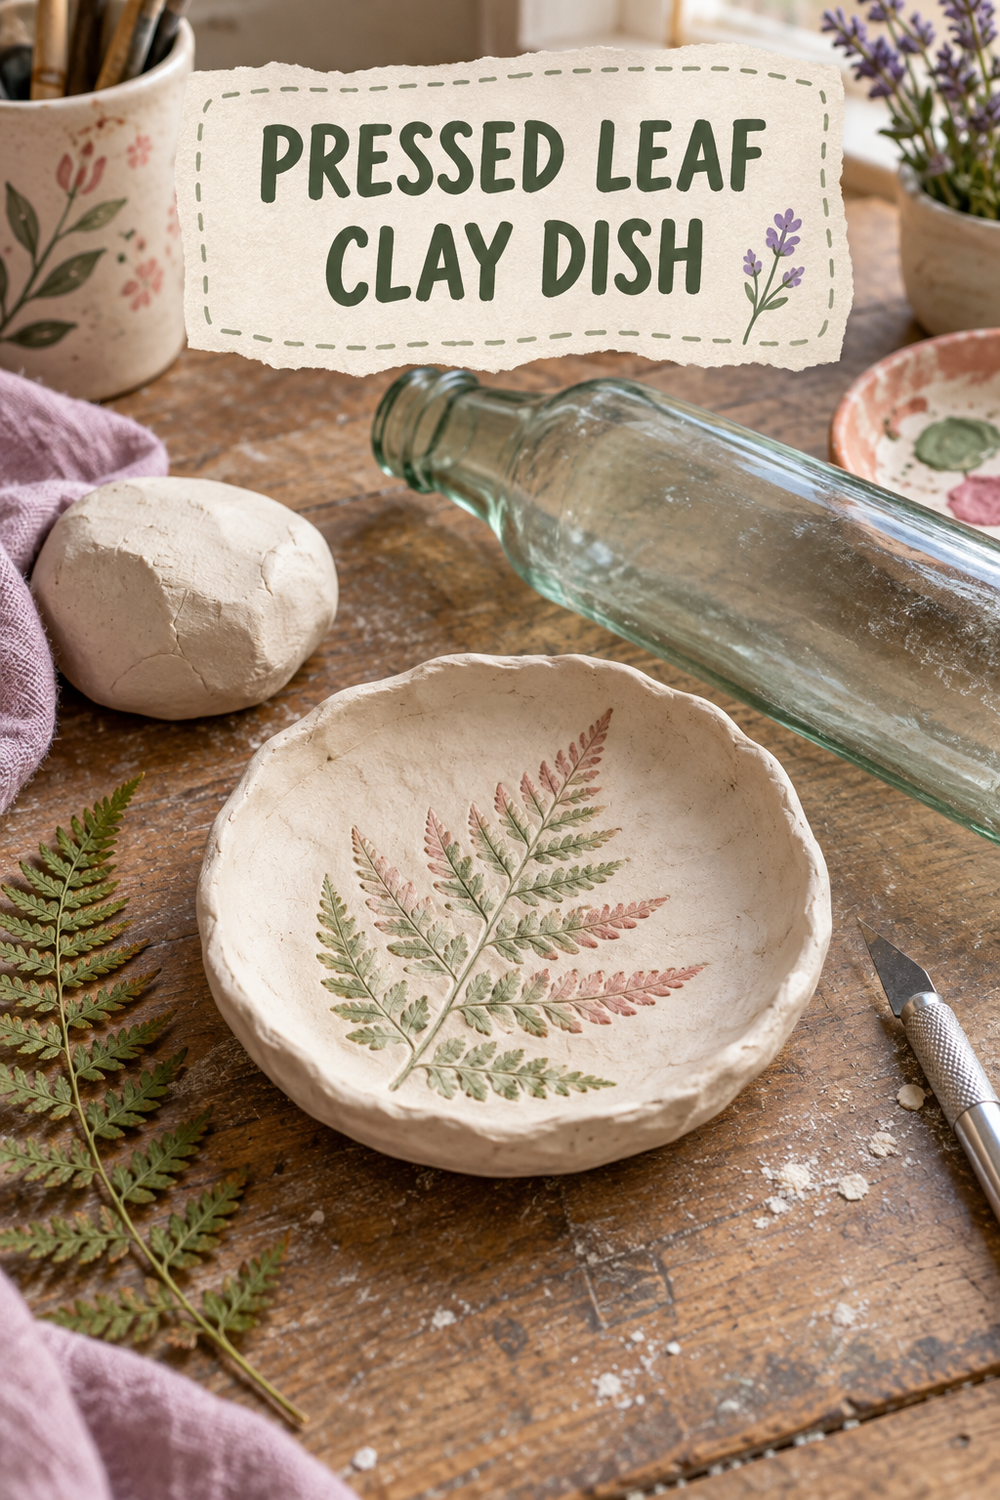
The idea: A real leaf works like a texture stamp. Pressed into soft clay, it leaves tiny veins that look intricate without requiring drawing or carving. A gently uneven rim keeps the finished dish warm and handmade.
Pick the right leaf
Choose a fresh, flexible leaf with raised veins on the back. Ferns, maple leaves, rosemary sprigs, and small hydrangea leaves can all work. Avoid brittle or very wet leaves. Wash off dust, pat dry, and keep the leaf flat until you are ready to press it.
Shape the dish
- Condition the clay. Knead a palm-size piece of air-dry clay until it feels smooth and flexible. If it cracks immediately, work in one or two drops of water—too much will make it sticky.
- Roll an even slab. Roll the clay between two pieces of parchment to about ¼ inch thick. A smooth glass bottle works well if you do not have a clay roller.
- Press the leaf. Place the leaf vein-side down. Cover it with parchment and roll once or twice with gentle, even pressure. Peel the leaf away slowly from the stem toward the tip.
- Cut the shape. Trace around a small bowl or saucer, then cut with a craft knife. Smooth the edge with a damp fingertip, keeping the water light so the clay does not turn muddy.
- Create the curve. Lay the clay circle inside a shallow bowl lined with parchment. Press it down just enough to form a dish, then soften any new cracks along the rim.
- Dry patiently. Let the clay dry according to its package directions, usually 24–48 hours. Turn it over when the top feels firm so the base can finish drying evenly.
- Add soft color. Use a nearly dry brush to skim muted sage over some veins and dusty rose over others. Wipe the highest areas with a barely damp cloth if the color becomes too strong.
- Seal if desired. Once the paint is dry, add a thin water-based craft sealer. Let it cure fully before using the dish for rings, buttons, clips, or other dry objects.
Paint it two ways
For a quiet botanical look, leave most of the dish cream and dry-brush only the leaf veins. For more contrast, paint the whole impression in watered-down sage, let it settle into the lines, then wipe the flat surface clean before it dries.
Common fixes
The leaf sticks
Peel slowly rather than pulling straight up. If your clay is very wet, dust the leaf with the smallest amount of cornstarch before pressing.
The dish warps while drying
Dry it away from direct heat and turn it only after the top is firm. Slow, even drying reduces curling.
Small cracks appear
Smooth them while the clay is still damp using a tiny coil of fresh clay and a wet fingertip. A rustic rim can be uneven, but structural cracks should be repaired.